
StableNet® Blog
Regular posts on all things StableNet® related from a sales, techie, or marketing perspective
How to create your own tag tree
Jul 10, 2018 | Blog, Network Management
When StableNet® version 8.0 was released in the beginning of 2017, one of the biggest changes to the tool was the new tag feature. Tagging completely changed the way elements within StableNet® can be classified, organized, filtered, and generally operated on. In my mind, this was a giant leap forward for the product and huge benefit to our customers.
Although tagging changes many operational aspects of StableNet®, the one that is most easy seen to every user is within the new created tag trees. In this article, I am going to explore these tag trees in more detail and specially describe how users can create their own tag trees to provide a customized view of their elements.
To best understand what a tag tree can do for you, I think it is useful to look back at how StableNet® trees operated before tagging was created. Prior to version 8.x all elements in StableNet® (devices, measurements, monitors, and so forth) were placed into the inventory and measurement trees in a very specific order. That order (or hierarchy) was pre-defined during discovery and was typically based on location | device type and so on. Although each customer could define how they wanted that tree to be established, once it was defined it could not be (dynamically) altered. Also, devices could only appear in a single location on the inventory tree. While this was very useable, it lacked the flexibility that many customers desired. Also, in StableNet® 7 and older versions users could not easily assign many attributes to elements that could be used within the tool. In order to address these limitations, the new concept of tagging was created.
Tagging now allows for an almost unlimited amount of user-defined attributes to be assigned to elements. Once these attributes have been set, the user can now perform many functions within StableNet® based on these tag values. As stated earlier, one of these functions is to create new dynamic element hierarchies called tag trees. Tag trees are seen in both the inventory and measurement themes (similar to older version) but are now also available within device automation theme and the Weather Map theme as well. Further, any number of tag trees can be opened additionally.
Let’s look at how to create a tag tree. Creating a tag tree involves two basic steps.
Step 1: Assigning tag values to elements
Before a tag tree can be created, the elements in StableNet® must have tag values assigned to them. The good news is that all devices have already the most important attributes assigned as tags by default! During discovery certain attributes about a device are converted into read-only tags. These are attributes such as:
- IP address
- Vendor
- Model
- Name
- OS
- .. and more
So, without any work at all, your devices already have tags that can be used to create a tag tree! However, the great thing about tagging is that users can assign their own attributes to elements. An example of some user-defined attributes might be:
- Location (country, city, building, data center, etc.)
- Application(s)
- Service level (gold, silver, etc.)
- Department (finance, sales, manufacturing)
Plus, virtually anything else that makes sense for corporate and IT structure. Tags can be assigned manually to an element, and/or they can be assigned in a scripted way during a discovery. For example, that could be read into or assigned to devices from a CSV file.
Once you have assigned tags – you can now move to:
Step 2: Creating a tag tree
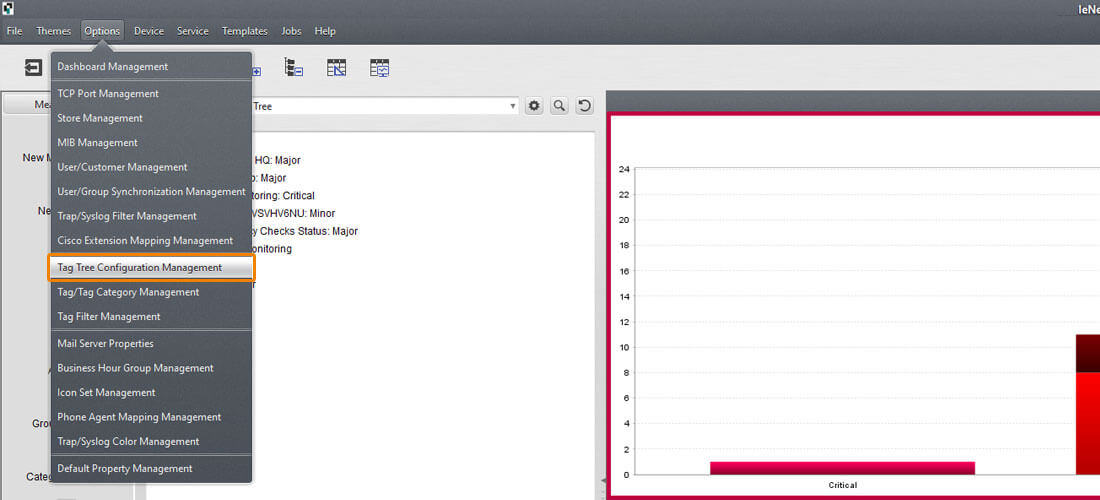
You can create a tag tree by selecting Tag Tree Configuration from the Options menu as seen below.:
This will take you to the main tag tree configuration screen which will list all of the existing tag trees. You will see that StableNet® automatically creates a number of default tag trees.
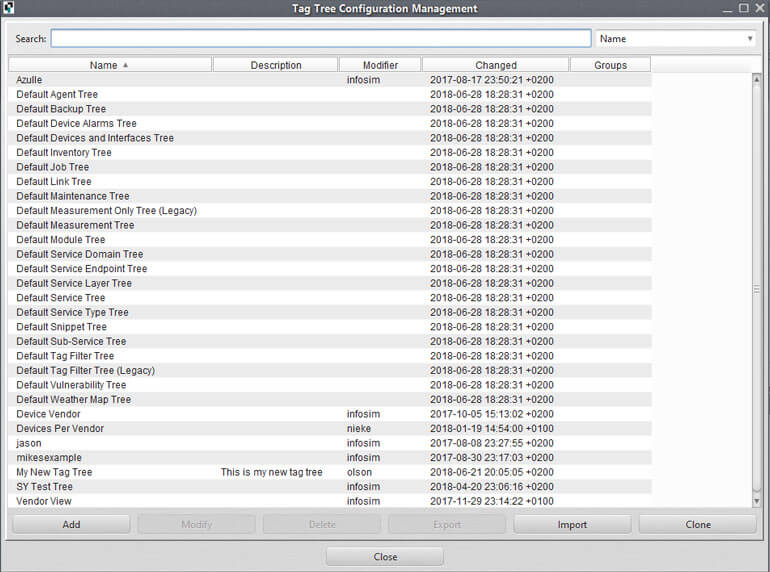
If you have upgraded from a previous version of StableNet®, then you will already have a default inventory and measurement tag tree that matches the structure that you had previously defined. This saves a lot of time!
From here, you can click Add to create a new tag tree. This takes you to the Tag Tree Configuration Wizard. The first step is to provide a name and description for your new tag tree.
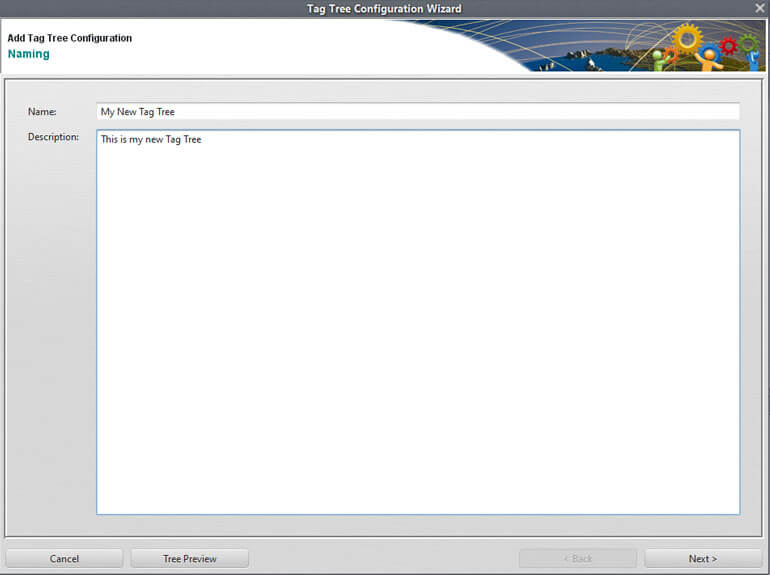
Click Next to move to the main tag tree configuration dialog. This is where the tree is built.
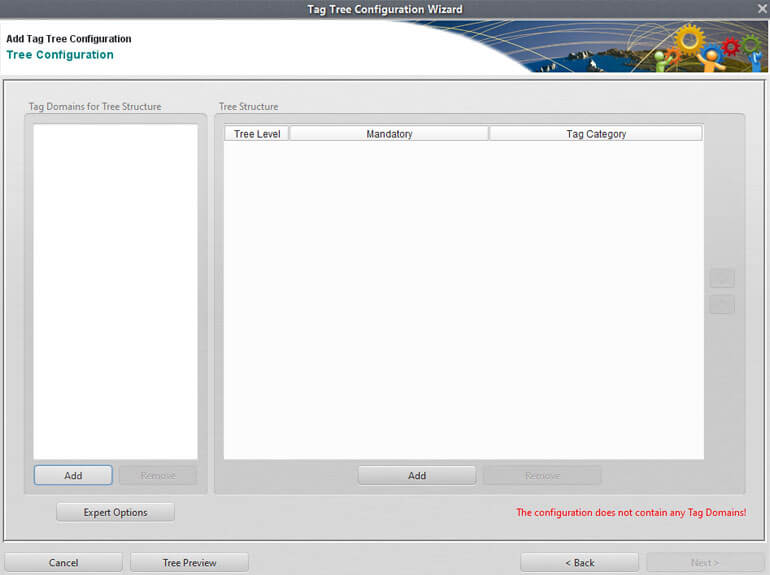
First, you must define the tag domain(s) that you will be selecting tags from. The possible tag domains are seen below. More information about tag domains can be found within the StableNet® documentation.
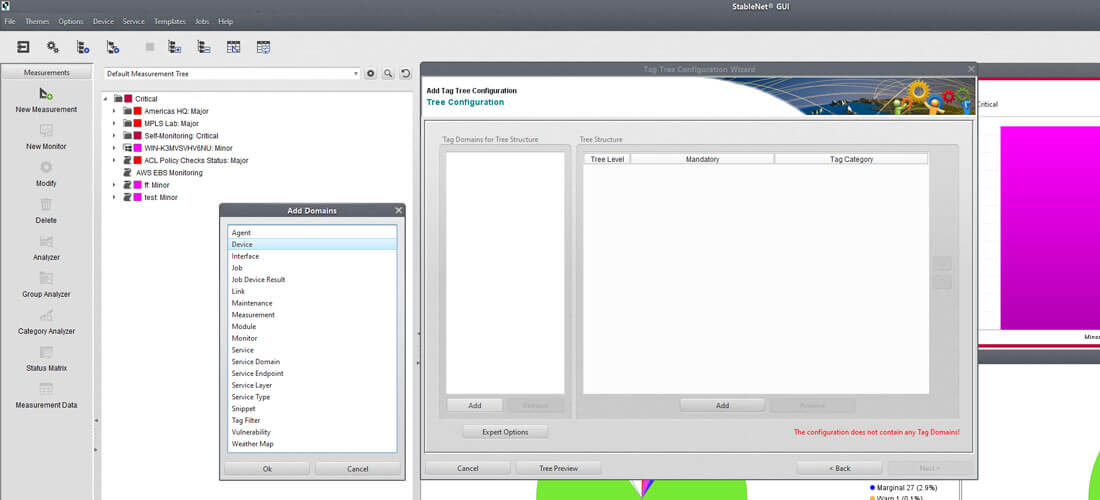
In our example, we are going to select the device domain. That means that all of the tags we will be using to create our tree will be from the device attribute domain. You can then click on the Add button at the bottom of the page to begin adding to the tag tree structure. You can add both read-only tags as well as user-defined tags to the tree structure. You can also select whether the tag is mandatory or not. Mandatory means that in order for a device to show up in the final tree it must have a tag value assigned to it for the tag category you select. This is a nice feature to make sure that your final tag trees do not include to many “stray” devices.
In my example, I have selected a few read-only tags, as well as one user-defined tag called “Service VLAN”.
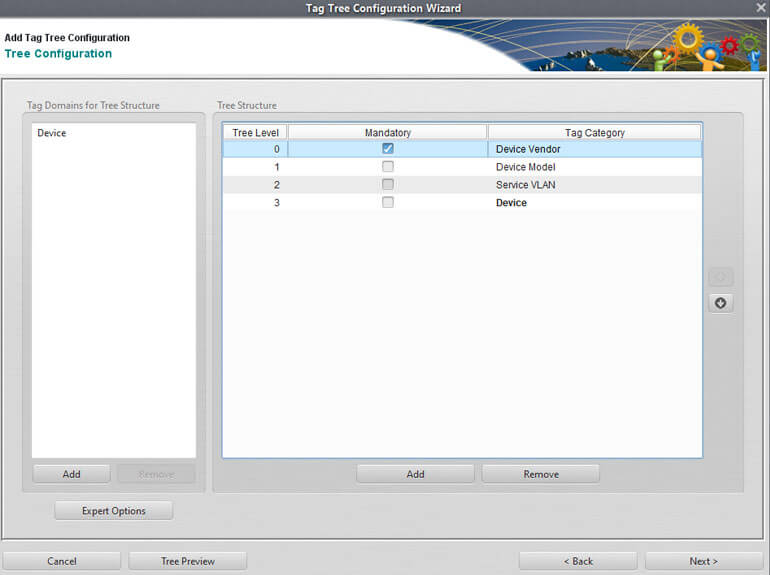
One great feature is the Tree Preview button on the lower left that lets you see what the resulting tree will look like before you save it. This makes also sure that you are creating what you want.
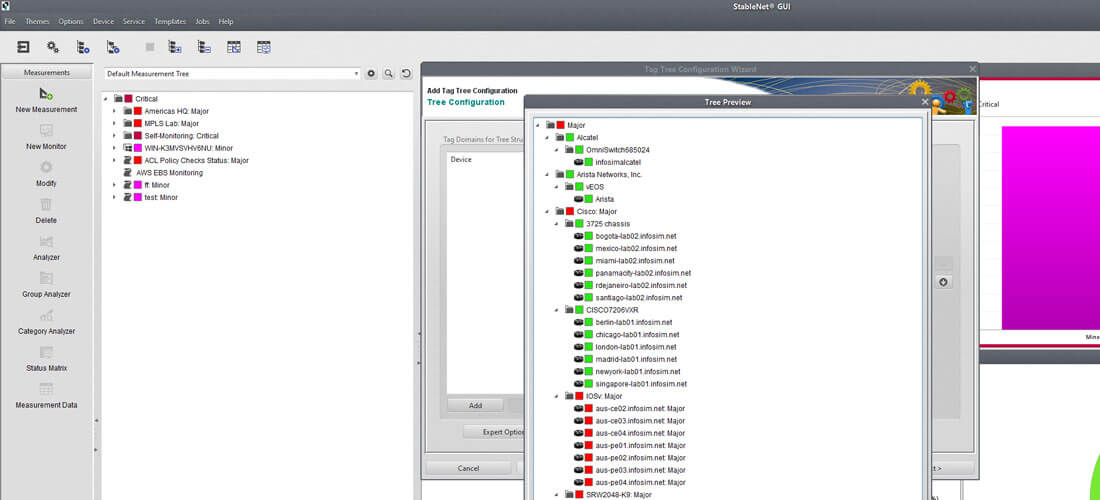
Clicking Next brings you to the filter screen where you could further filter your tag tree to only include certain devices. For example, you may want your tag tree to only include devices from a specific vendor. I have added the filter for Cisco in my example, which changes my tree to now look like this:
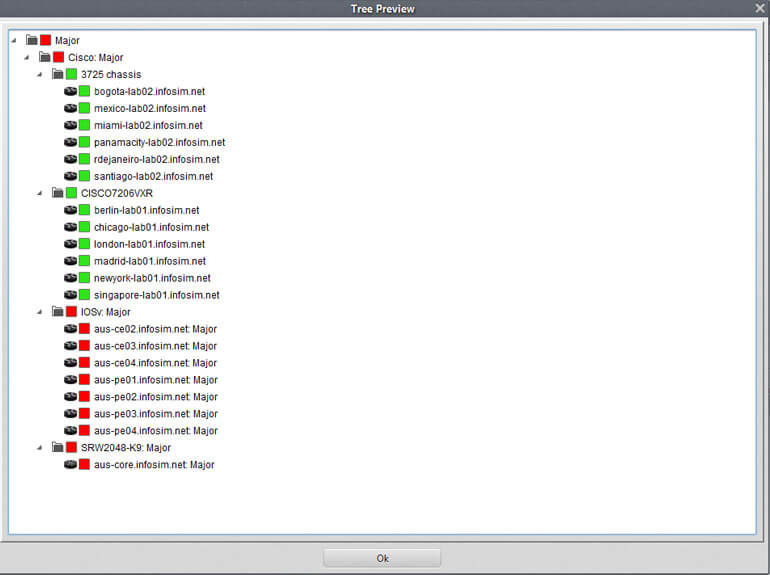
At this point, the tag tree is complete. You will be able to see the new tag tree as a selection in the inventory theme:
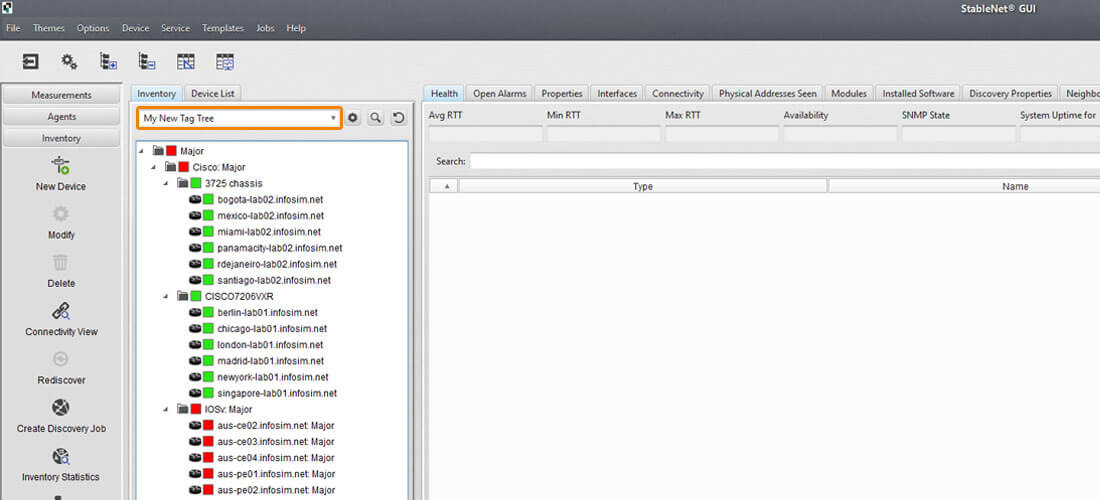
With tag trees, you now have complete and dynamic control over what your element hierarchy looks like. You can create as many trees as you like and even assign trees to only be viewable by certain users/groups. As an example, it is very common to have a special tag tree defined for NOC users and a different tree defined for operations or engineering, etc.
Tag trees are one of the most exciting new features in StableNet® 8.x. By combining the customization of attribute tags with the flexibility of dynamic trees StableNet® has delivered incredible power to our users.

Vlad Singeorzan
Senior Consultant at Infosim®
Author
Ready for automated multi-vendor network management?

Software
Made in Germany
